
In-Depth Read: "The Visual Airstream"
Air. It's the fundamental fuel that allows your wind performers to clearly communicate their musical lines to the audience. Great air flow is needed to produce a quality, characteristic sound. It's needed to play with great intonation. Proper presentation of breath control is needed to accurately attack and release notes as an ensemble, and to do so with clear sound and technique. The airstream is life! And boy are we bad at using it.
We're not bad at using air because we're bad people, but because we simply aren't attuned to the physical processes that our bodies use to control and direct the airstream. Breathing is completely automatic for us, and we don't give a single moment's thought to our breath as we speak. Because of this automatic nature of breath, we are not normally perceptive of how we are using the lips, teeth, tongue, and throat to control and direct airflow, and this lack of perception bleeds into our wind players' performance. Throw in the fact that air is invisible, and it becomes a tough proposition to diagnose and improve your students' airflow issues. But making the invisible visible can go a long way towards improving airflow! Here's how.
Use Visual Monitors
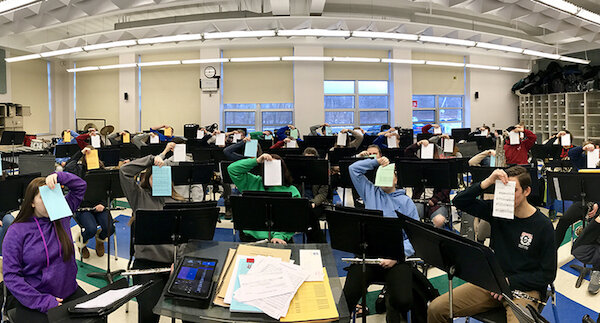
Look at the picture in this article, featuring the West Seneca West High School Wind Ensemble in West Seneca, NY, as it demonstrates the following technique. This works great, especially for brass players. Have your students take a simple piece of paper and fold it in half (either way will do) and then hold it in front of their faces, about 6 inches in front of the lips. Simply have them blow a stream of air onto the paper, but tell them that the paper must bend as far from their lips due to the airflow. This will establish the strength of the wind column they must produce and sustain. See how much they can make the paper move and how long they can sustain that distance.
Now, have them put their mouthpieces (works for woodwinds too!) to their lips and blow silent air at that piece of paper (no buzzing or vibrating reeds). See if their papers still move the same distance, or at all. You and your students be astounded to see that some of them already have a major decline in airflow, and lips and reeds aren't even in the way yet!
Finally, have your wind players buzz (any pitch will do) and vibrate their reeds through their mouthpieces at their piece of paper. This will be the most telling moment of all, as you'll see over half of that paper in front of their faces barely move at all. You have made their airstream visible and the results will be sobering for your students!
So where is the air going? Why isn't it getting out of their lungs and through those mouthpieces. The next steps will help you diagnose and improve this issue.
Do It Wrong!
There are three places that the airstream can be impeded:
- Lips
- Teeth/Jaw
- Tongue/Throat
As mentioned earlier, we as humans aren't very good at being self-aware of what's happening in these areas. So help your students learn what it feels like to control and properly use these areas of their wind column by doing things intentionally wrong first!
Lips
Let's start with the lips. Have your students clamp their lips tightly and try to blow through their mouthpieces at that piece of paper. While it seems obvious, lips being too tight, especially in the center of your brass players' embouchures, is a common air impedance for wind performers. Now that they can feel what it's like to do it wrong, have them loosen their lips and blow air onto the paper through their mouthpieces. Not only will their eyes show them the difference as the paper moves a significantly greater distance, but their eyes will be able to tell a change in the sound of the airflow. Highlight these differences for them.
Teeth
The teeth/jaw is another common blockage for airflow, so let's help open it up. Have your wind players grit their teeth as they blow at their paper monitor. Again, highlight the sound quality of the airstream as well as the (lack of) movement in the paper. Now have them pretend to chew a big piece of gum their back teeth as they politely keep their mouths closed. Have them freeze with their jaw open and then blow their air. Not only will the teeth be out of the way, creating lots more motion in the paper monitor, but once again there will be a marked change in the sound quality of the exhale. Once again, highlight these differences for your students.
Tongue/Throat
This is the most insidious place where air is stopped. The placement of the tongue in the mouth directly affects how open the throat is to airflow. Again, we're not good at knowing where are  tongues are inside our mouths at any given moment, so let's learn what it feels like to have incorrect tongue placement. First, have your students take their left hands and place it around the tops of their throats (see image). Now have them move their tongues backwards and upwards inside their mouths. They'll be able to fill their throat filling as the tongue expands and blocks the larynx. Have them hold the tongue in that position as they blow on their paper monitors. The sound will be hissing and anemic and the paper will not move very much. Now have them do the opposite, moving the tongue forward and down, resting behind the lower front teeth. With their left hand, they will feel their throats open. Have them maintain that tongue position as they blow on their paper monitors, and the sight and sound will be very different!
With all of this newfound awareness of their air column, your students will have a far clearer and more powerful wind stream. Have them apply this newfound knowledge as they buzz their mouthpieces and reeds and then move to their instruments. The improvement in volume, tone quality, intonation, range, and more will instantly improve your experience and that of your student performers!